
WooCommerce
Growify’s WooCommerce integration allows you to track customer events and gain deeper insights into your store’s performance.
1. Header Footer Code Manager (HFCM) Plugin Installation
This setup include an optional Header Footer Code Management plugin (HFCM) to make the process easier and minimize the need for technical assistance. Alternatively, you can manually add the necessary PHP and Javascript code if you prefer.
Log in to your WordPress dashboard
Navigate to Plugins → Add New Plugin on the left sidebar (1)
In the search bar, enter 'HFCM' (Header Footer Code Manager) (2)
Locate Header Footer Code Manager by DraftPress, then click Install Now (3)
Once installed, click Activate to enable the plugin (4)

2. Pixel Installation. Start tracking View Events
The Growify PowerPixel is a code snippet that enables us to gather behavioral data about your website visitors. The data feeds into our backend graph, allowing us to track customer journeys from site visit to purchase, along with marketing touchpoints in between.
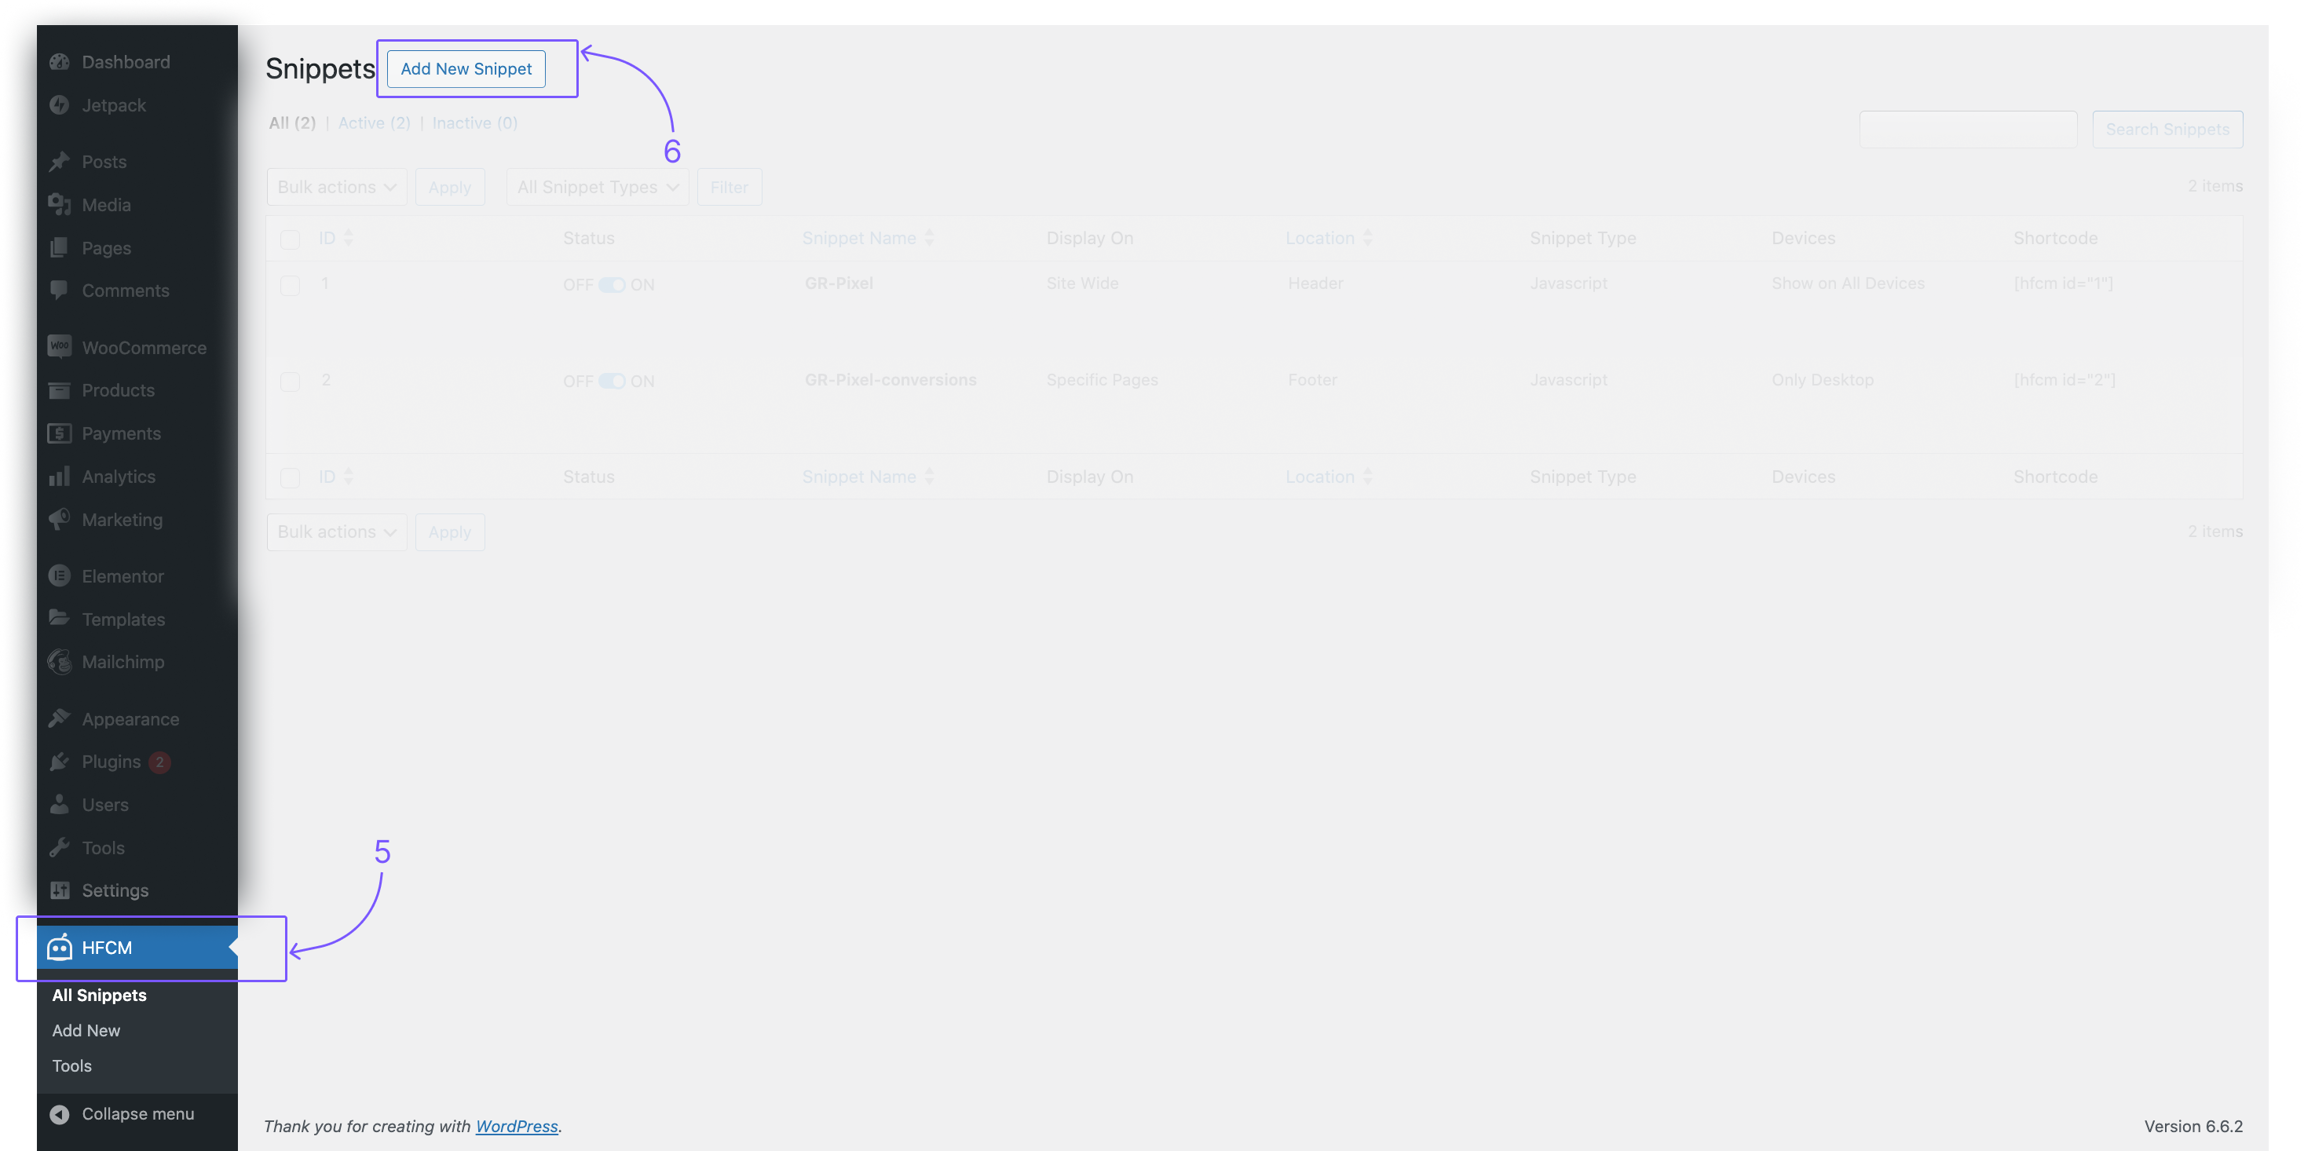
In the WordPress dashboard, go to HFCM in the left menu (5)
Click HFCM → Add New Snippet to create a new code snippet (6)
Complete the form (Snippet Name, Snippet Type, Site Display ... ) as required for your snippet (screen below)
Copy and insert the script into the Snippet/Code section (7)
Click Update to save the snippet. (8)

3. Verify PowerPixel Connection and Status
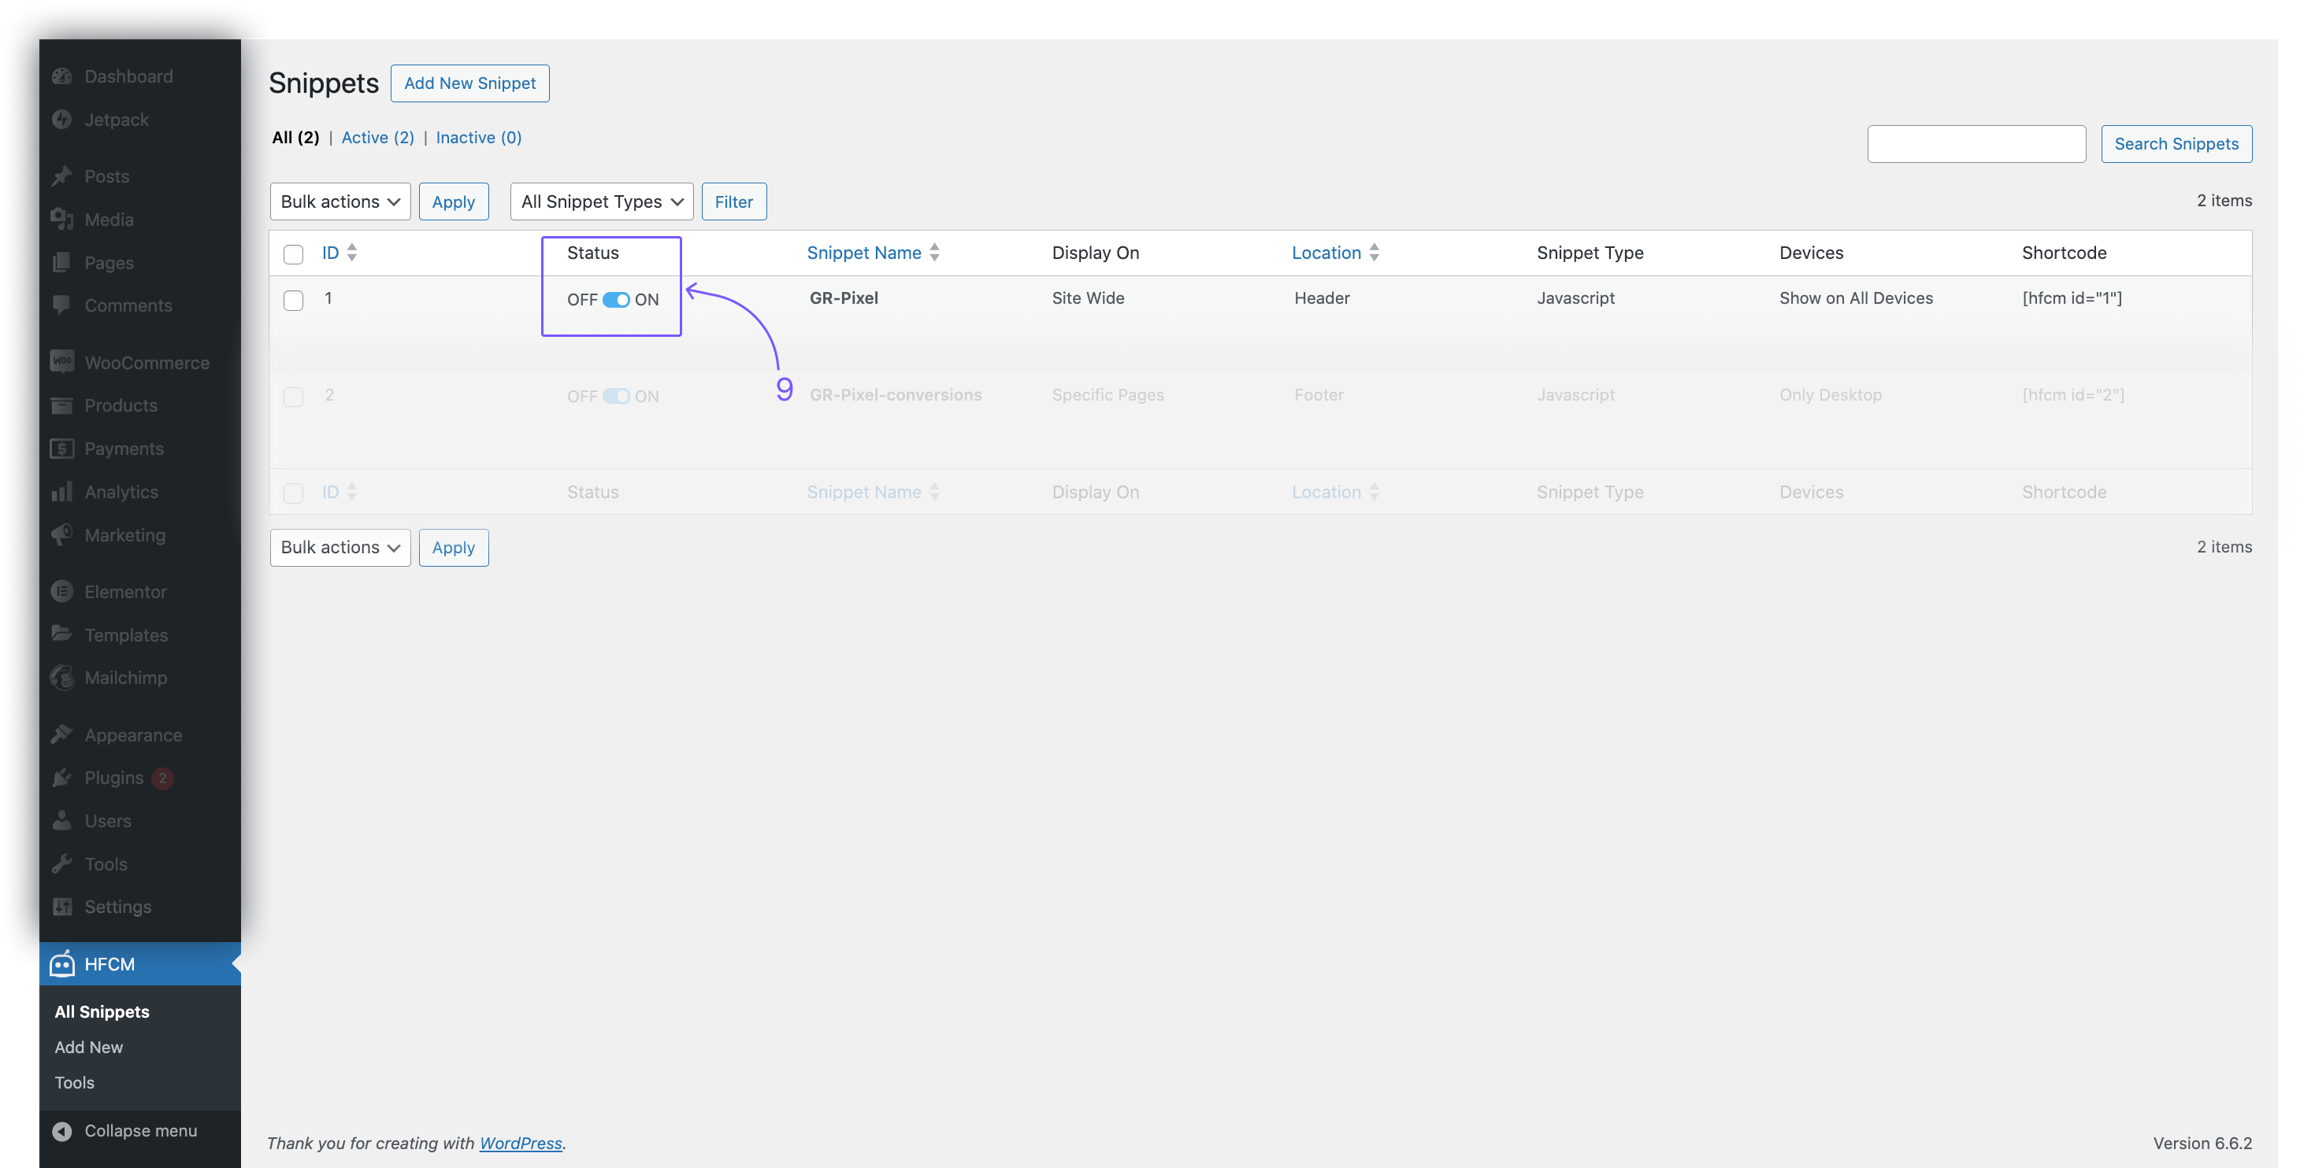
Ensure the code snippet is active (9)
Navigate to your store's homepage
Open a DevTools
Windows: Ctrl + Shift + I or F12
macOS: ⌘ + ⌥ + I
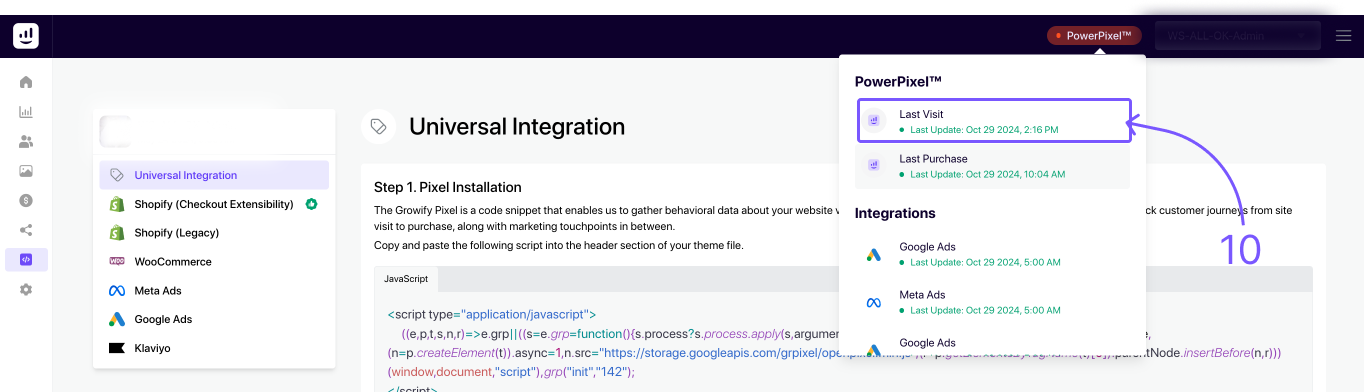
Refresh the page, then go to the Network Tab. Filter by the keyword 'grpV2' and locate the event

If the event has been located, the status will be updated as soon as the data is indexed (which takes around 10-15 minutes) on the Growify dashboard. (10)
4. Conversion Events
In the WordPress dashboard, navigate to HFCM in the left menu (5)
Click HFCM → Add New Snippet to create a new code snippet (6)
Note: The SDK should be configured to run on your Order Details page. Ensure that Steps 2 and 3 are properly set up.
Complete the form (Snippet Name, Snippet Type, Site Display ... ) as required for your snippet (screen below)
Copy and insert the script into the Snippet/Code section (11)
Click Update to save the snippet. (12)

Align the code snippet with your Order Details page structure
Since each WordPress/WooCommerce page may have a custom structure, we highly recommend having someone with basic JavaScript knowledge align the script.
If you need assistance updating the snippet, reach out to us via chat and share the link to your Order Received page
Update the condition for when to fire a conversion event
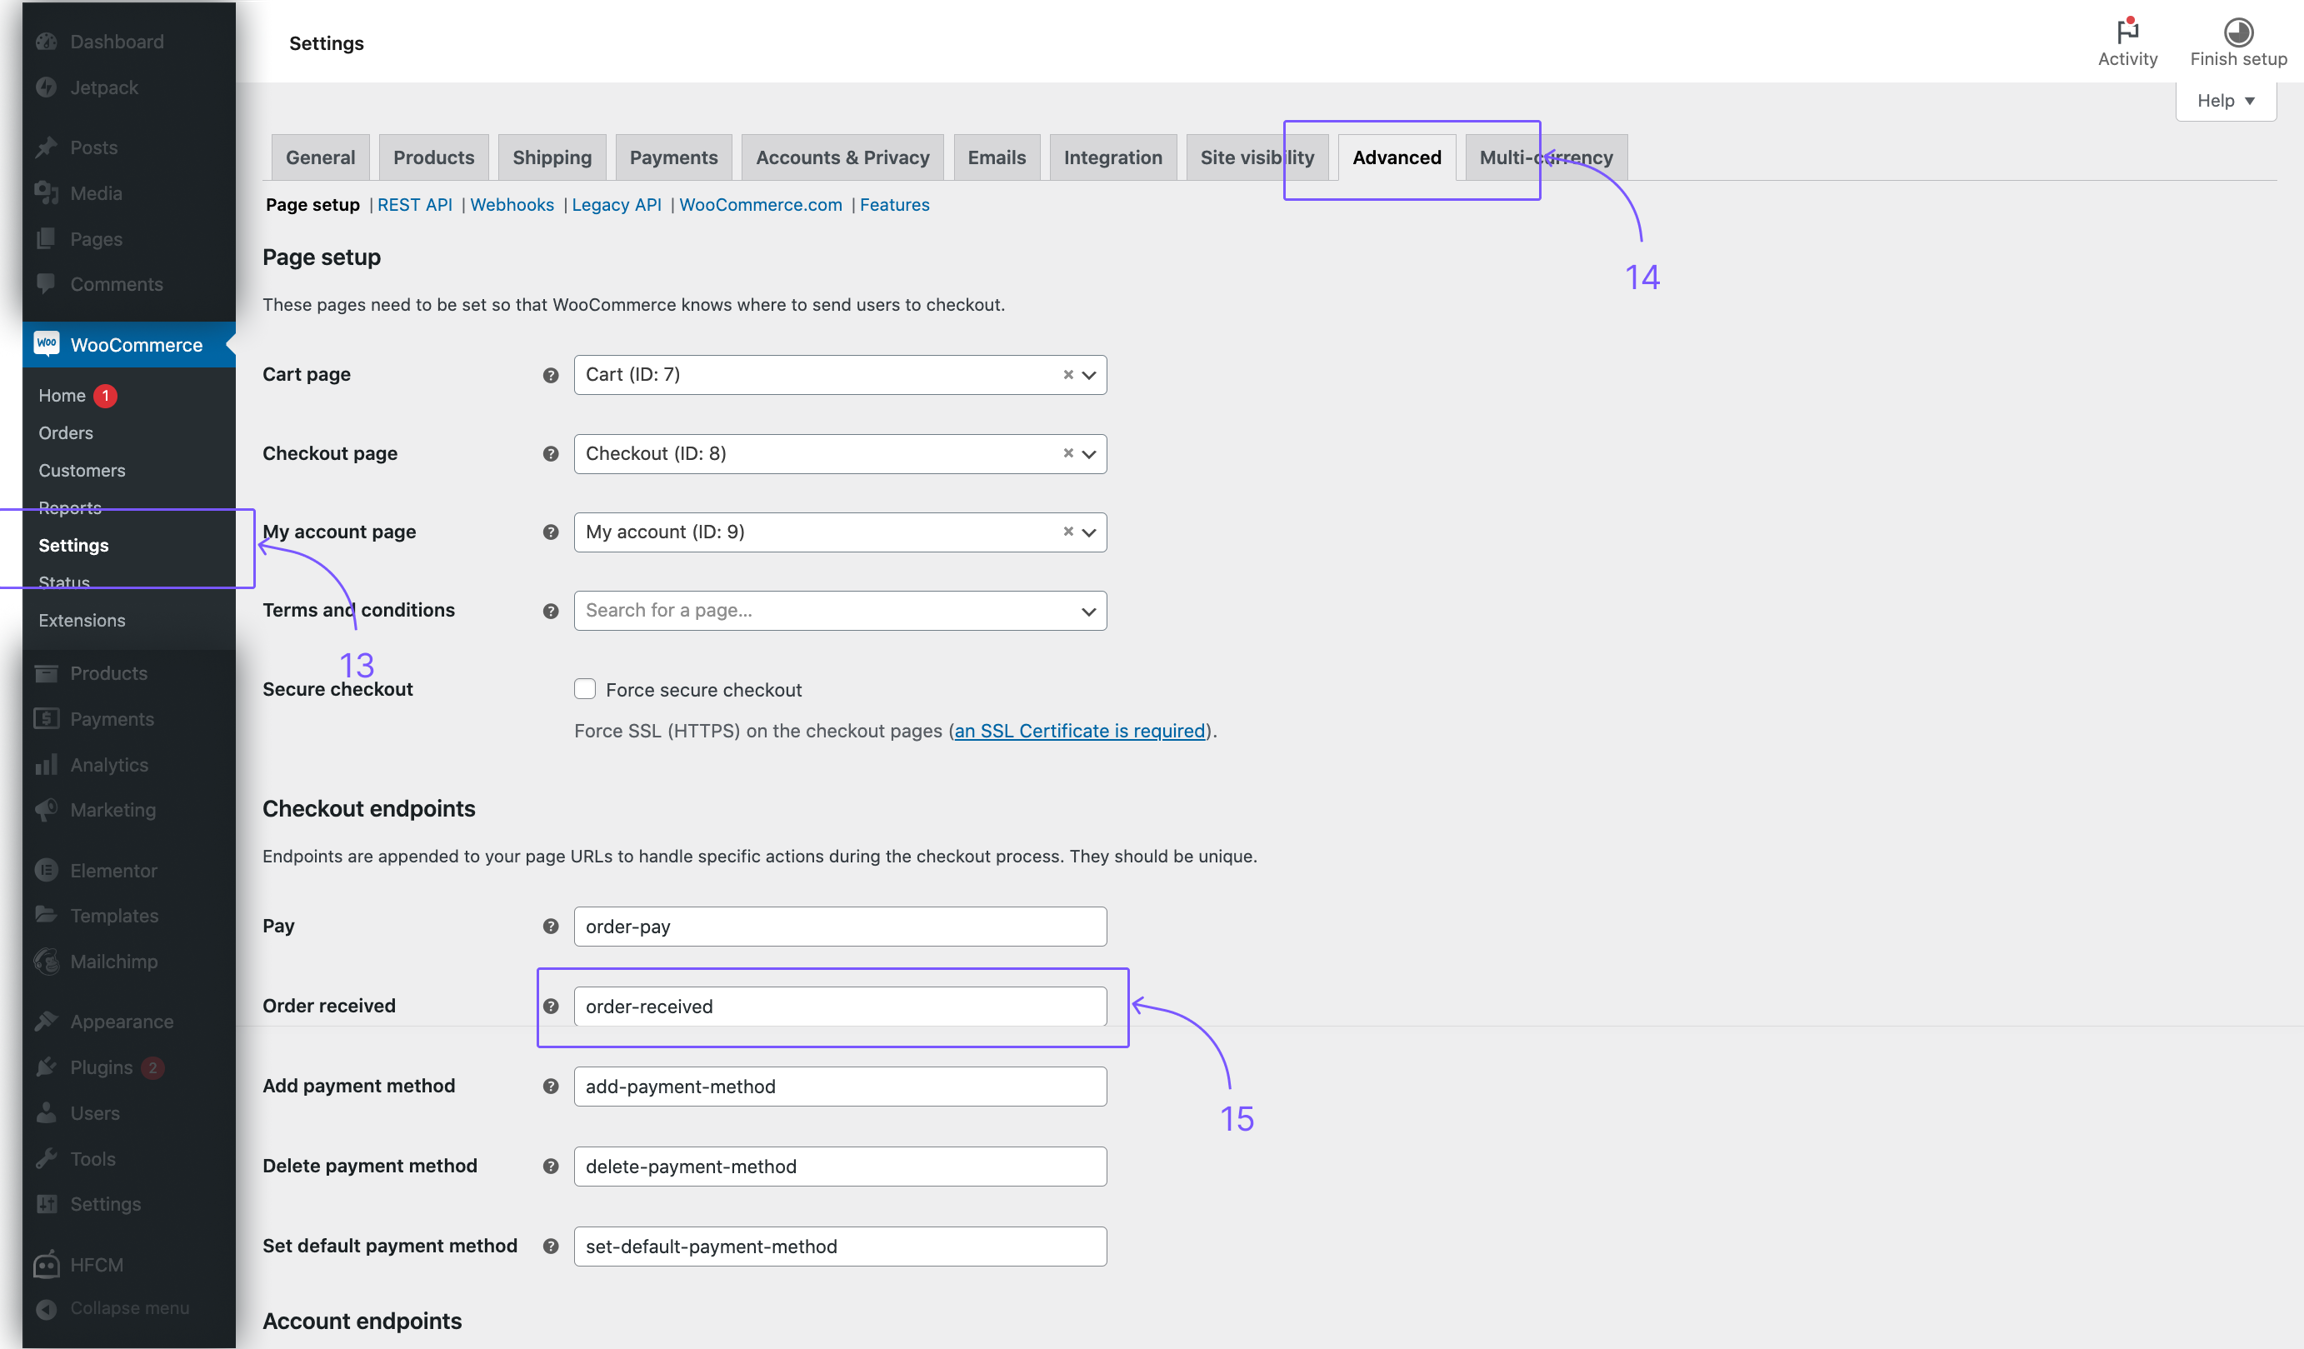
In the WordPress dashboard, navigate to Woocommerce → Settings in the left menu (13)
Switch to Advanced tab (14)
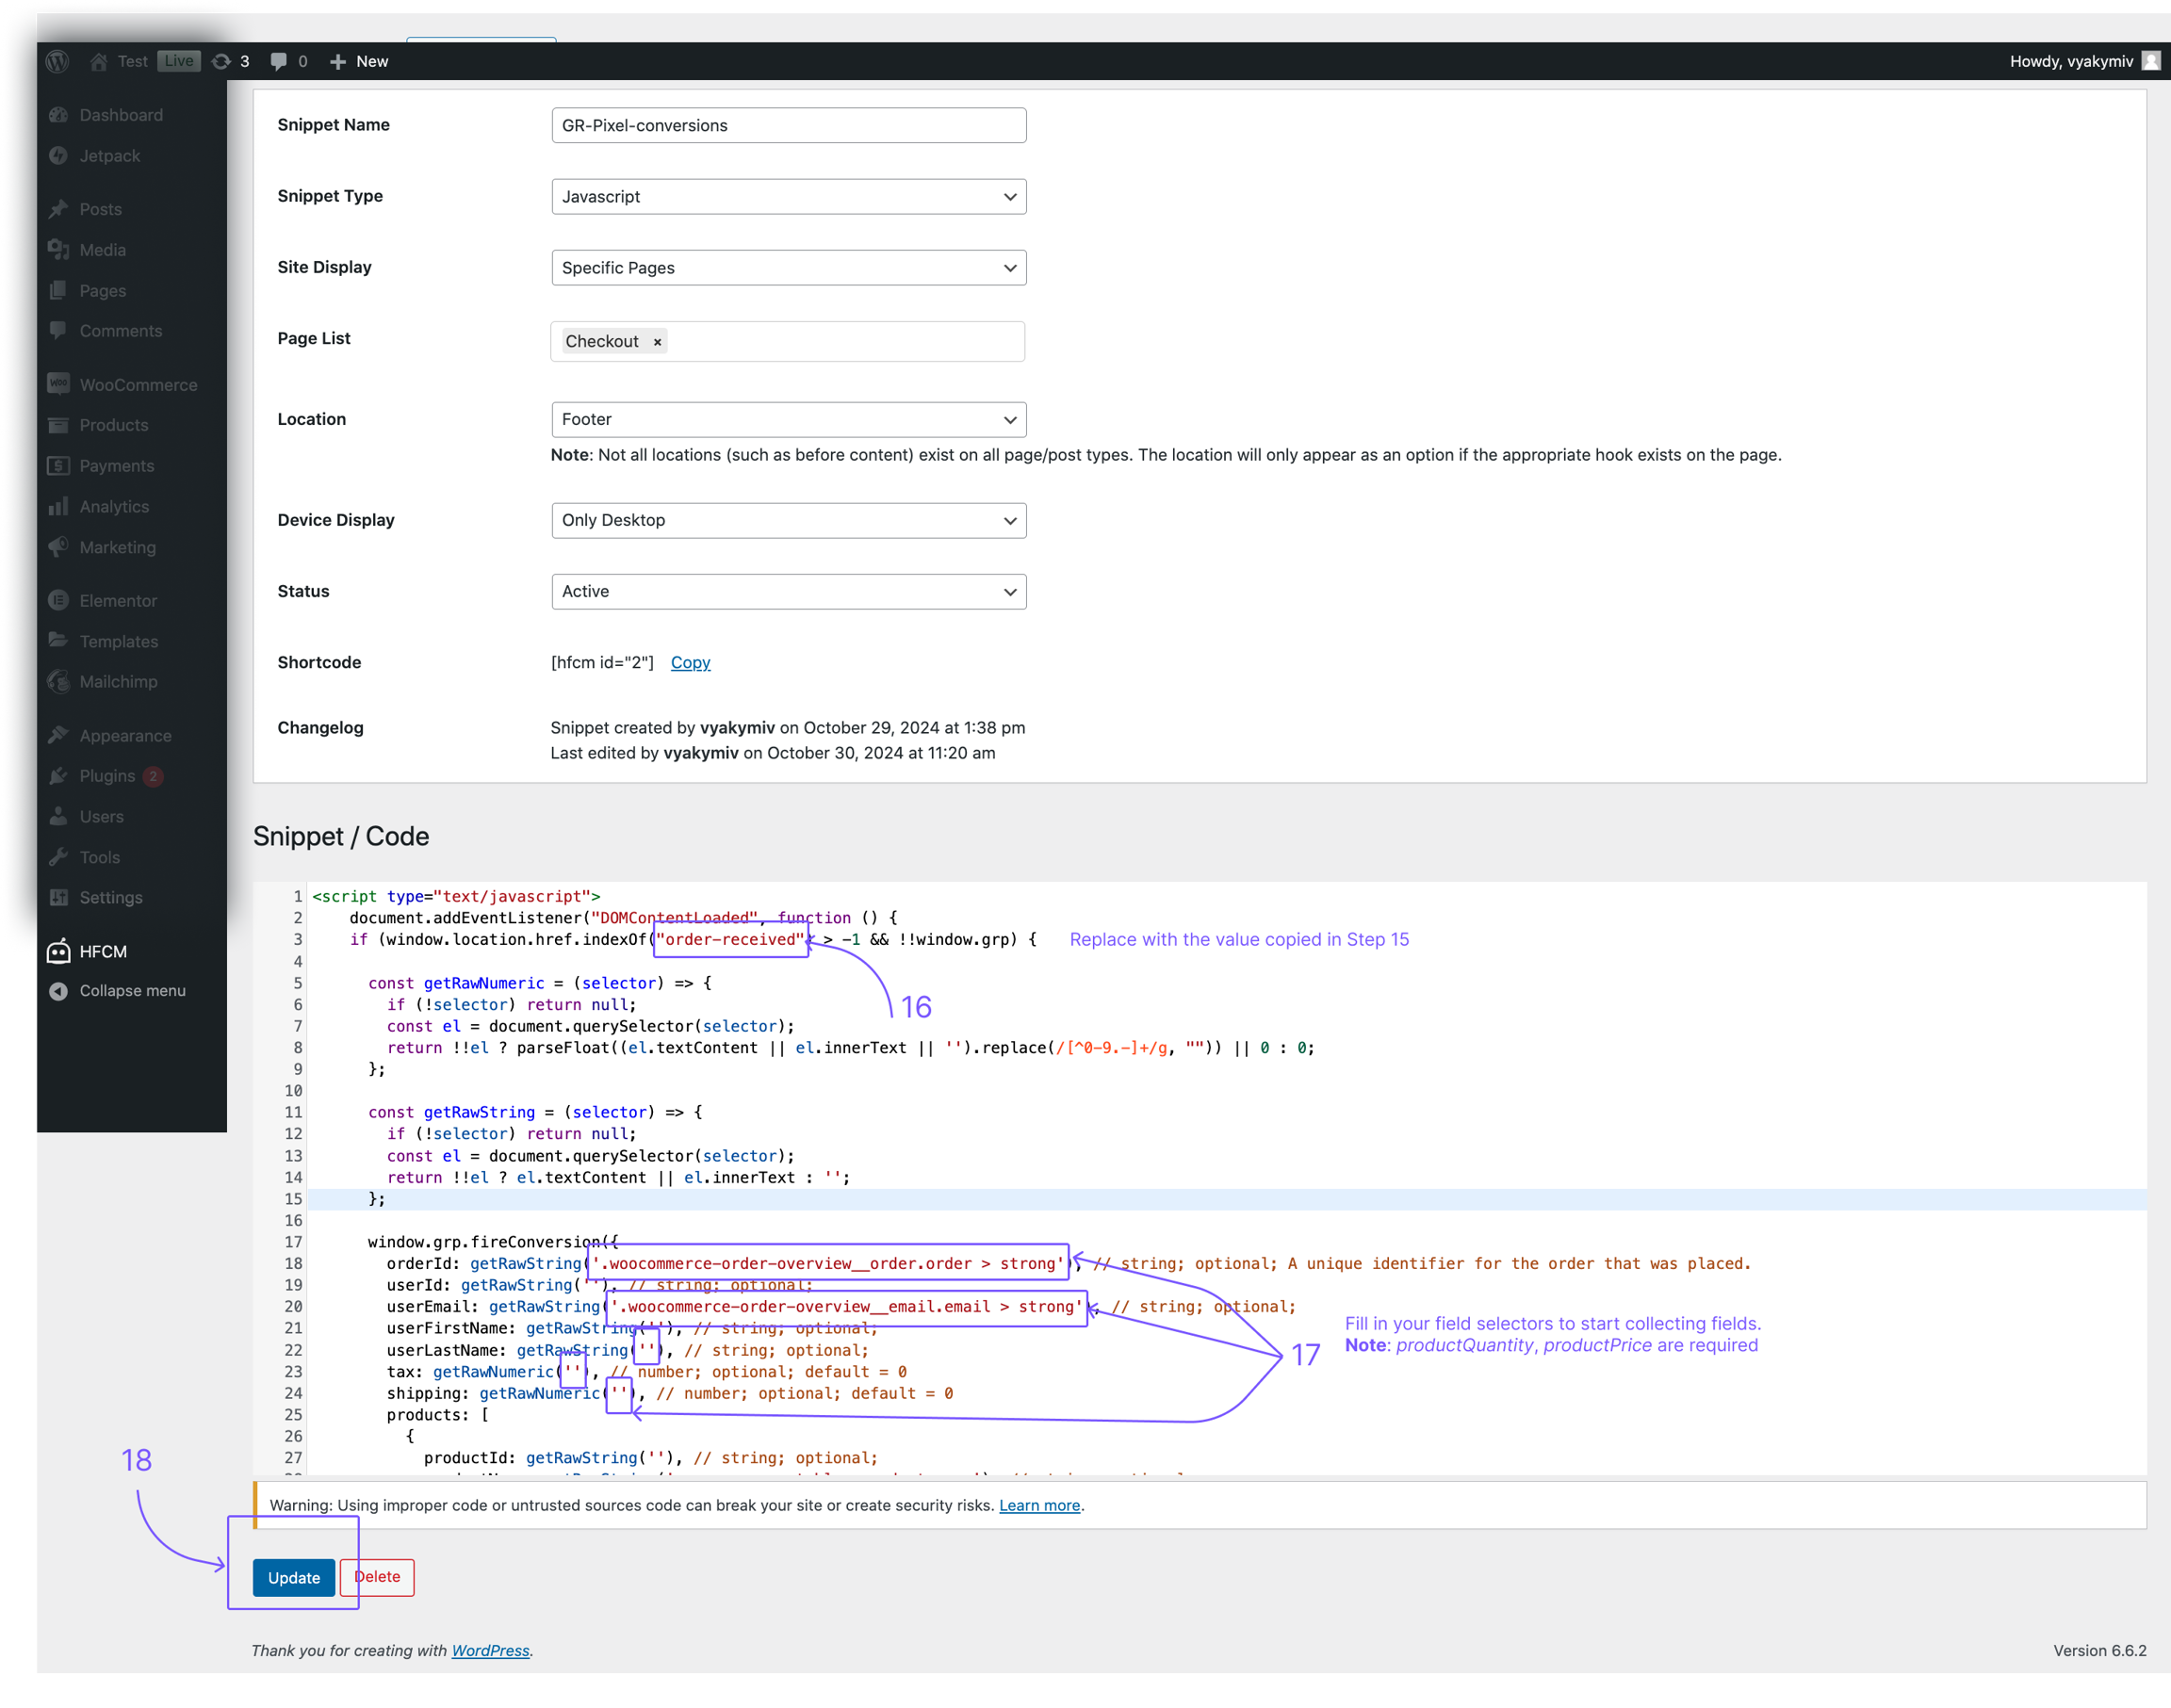
Find out Order Received endpoint and copy the value (15)
Navigate to your snippet and replace 'order-received' with your value (16)
Replace the CSS selectors with the appropriate ones according to your page structure. (17)
productQuantity: Required; Integer; Should be greater than 0;
productPrice: Required; Number; Should be greater than 0;
Click Update to save the snippet. (18)
Last updated